The most reliable pattern for Kubernetes LLM deployment is serving your model with vLLM inside a standard Deployment, exposed through a ClusterIP Service, with weights on a PVC and credentials in a Secret. Add the NVIDIA or ROCm device plugin,
then layer KEDA for replica scaling and Cluster Autoscaler or Karpenter for node provisioning. Your first three moves: pin a vLLM image and containerize it, apply the Deployment plus Service, PVC, and Secret manifests, then port-forward and hit the /v1 endpoint to confirm the GPU is actually being used. Self-hosting pays off once sustained traffic and latency requirements outgrow what a hosted API can justify on cost.
TL;DR:
- Proper GPU setup requires installing the correct device plugin and verifying capacity with
nvidia-smiorrocm-smion nodes before deploying models.- Containerizing an LLM server benefits from using pinned images, downloading weights via initContainers to a PVC, and running containers as non-root with matching driver versions.
- Kubernetes manifests should specify identical GPU request and limit, with a ClusterIP service behind an ingress layer, and secrets for access tokens or credentials.
- Autoscaling relies on KEDA for dynamic replica counts based on request queues and the cluster autoscaler to add nodes, with tuning needed for latency and workload spikes.
- Self-hosting becomes cost-effective for sustained high throughput or strict data residency, but operational readiness and proper security controls are critical for safe deployment.
Table of Contents
- Cluster and Node Prerequisites Before You Deploy LLMs on Kubernetes
- How Do You Containerize an LLM Server for Kubernetes?
- What Kubernetes Manifests Do You Need for LLM Inference?
- vLLM Deployment Patterns and Multi-Node Inference
- Setting Up GPU Device Plugins on Your Nodes
- Autoscaling: KEDA for Replicas, Cluster Autoscaler for Nodes
- Monitoring and Testing Your LLM Service on Kubernetes
- Troubleshooting Cold Starts, OOMs, and Pending Pods
- When Should You Self-Host vs. Use a Hosted LLM API?
- Data Privacy and Compliance Considerations for LLM Deployments
- Model Update and Rollback Strategies for LLMs on Kubernetes
- CI/CD Pipelines for LLM Kubernetes Deployment
- Performance Optimization for LLM Inference on Kubernetes
- Multi-Tenancy and Tenant Isolation for LLM Services
- Security Best Practices for LLM Deployments on Kubernetes
- Why Bowtie Thinks Most Teams Underestimate the Operations Side
- Get Help Shipping Your LLM Deployment to Production
- Primary Docs and Tutorials Worth Bookmarking
- Sources
- FAQ
Cluster and Node Prerequisites Before You Deploy LLMs on Kubernetes
Most failed Kubernetes machine learning deployment attempts trace back to skipped prerequisites, not bad application code. Before you write a single manifest, confirm the cluster itself is ready for GPU workloads.
Start with version compatibility and hardware. A recent Kubernetes release (1.28 or newer) plays best with current device plugins and KEDA scalers. Beyond that, check off these items:
- Install the NVIDIA device plugin or the AMD ROCm device plugin so the scheduler can see
nvidia.com/gpuoramd.com/gpuresources on your nodes. - Choose your storage path: a PVC backed by fast block storage for model caches that survive restarts, or
emptyDironly for ephemeral test pods where reload time doesn’t matter. - Create a Kubernetes Secret holding your Hugging Face token if you’re pulling gated weights, or S3/IAM credentials if you’re pulling from object storage or FSx for Lustre.
- Decide early whether you’re running a single-GPU test node for prototyping or a multi-node cluster with an autoscaler for production. Mixing the two without a plan is how test traffic ends up starving production pods.
Get these four right, and the actual deployment manifests become almost mechanical.
How Do You Containerize an LLM Server for Kubernetes?
Containerizing a vLLM server is simpler than most engineers expect, mostly because vLLM already ships an official image with the serving engine baked in. The work is in the decisions around it, not the Dockerfile itself.
- Start from a pinned base image. Use
vllm/vllm-openai:v0.x.x(a specific tag, never:latest) or build a slim FastAPI wrapper on top of a CUDA runtime image if you need custom preprocessing or auth logic before requests hit vLLM. - Decide how model weights reach the container. You have three real options: bake weights into the image (fast cold start, huge image, painful rebuilds on every model update), download them via an initContainer to a PVC (clean separation, slower first pod start), or pull them at runtime inside the main container (simplest, but you’re gambling cold-start latency on network speed).
- Harden the image itself. Run as a non-root user, pin CUDA or ROCm library versions to match your node drivers exactly, add an image-pull secret if you’re pulling from a private registry, and strip build tools out of the final layer.
For most production Kubernetes LLM setup work, the initContainer-to-PVC pattern wins. It keeps your application image small, lets you update weights without rebuilding, and matches the pattern documented in the vLLM Kubernetes deployment guide. Reserve bake-time downloads for small, rarely-updated models where startup speed is the only thing that matters.
What Kubernetes Manifests Do You Need for LLM Inference?
Four manifest types cover most single-node LLM deployments: Deployment, Service, PersistentVolumeClaim, and Secret. Each one has a couple of fields that matter far more for LLM workloads than for a typical web app.
The Deployment needs GPU resource requests and limits set to identical values (Kubernetes doesn’t support GPU overcommit the way it does CPU), a volume mount pointing at your model cache PVC, and often a larger /dev/shm allocation since NCCL and PyTorch’s shared memory usage can crash pods that only get the default 64Mi. The Service should almost always be ClusterIP, with an Ingress or LoadBalancer sitting in front of a gateway rather than exposing vLLM directly, a pattern worth following since a gateway layer centralizes auth, rate limiting, and token accounting instead of leaving every client to hit the inference pod raw.
The Secret typically holds HF_TOKEN for gated model downloads or S3-style credentials. If you’re using an initContainer to fetch weights before the main container starts, that container reads the same Secret and writes into the PVC that the main vLLM container later mounts read-only. The vLLM documentation’s Kubernetes examples walk through this exact probe and volume configuration in more depth than a single table can capture.
vLLM Deployment Patterns and Multi-Node Inference
Running vllm serve correctly comes down to a handful of flags that control memory and parallelism. --model points at your weights path or Hugging Face repo ID. --gpu-memory-utilization (commonly 0.85 to 0.95) sets how much VRAM vLLM claims for the KV cache versus leaving headroom for CUDA overhead. --tensor-parallel-size shards a model across multiple GPUs on the same node, which matters the moment your model doesn’t fit on a single card.
For single-node setups, size your context window and KV cache headroom together. A 70B model at full precision won’t fit on one 80GB GPU even with aggressive quantization, which is where tensor parallelism or a smaller model becomes the honest answer.
When a model exceeds what tensor parallelism across one node’s GPUs can hold, you need pipeline parallelism across multiple nodes, and that’s where LeaderWorkerSet (LWS) comes in. LWS is the Kubernetes SIG pattern purpose-built for this: one leader pod runs the vLLM server while worker pods participate in the parallel computation, coordinated through NCCL over hostIPC and expanded shared memory. The LWS vLLM example is the reference implementation worth copying rather than reinventing.
- Use a plain Deployment when the model fits on one node’s GPUs.
- Use LeaderWorkerSet when a single logical replica must span multiple pods for tensor or pipeline parallelism.
- Reach for StatefulSet only when you need stable network identity without the leader/worker coordination LWS provides.
Helm charts pay off once you’re managing more than one environment. A values file that parameterizes the image tag, initContainer download logic, PVC size, and autoscaling thresholds turns a helm upgrade --install vllm-inference ./vllm-chart -f values-prod.yaml command into your entire deployment ritual, a pattern the vLLM Helm chart documentation lays out with a full parameter table.
Setting Up GPU Device Plugins on Your Nodes
Nothing else in this stack matters if the scheduler can’t see your GPUs. Work through this checklist in order before you troubleshoot anything else.
- Install the device plugin. For NVIDIA, deploy the
k8s-device-pluginDaemonSet; for AMD, install the ROCm device plugin matched to your host kernel version exactly, since ROCm is far less forgiving of kernel/driver mismatches than NVIDIA’s stack. - Verify at the node level. Run
kubectl describe node <name>and confirmnvidia.com/gpuoramd.com/gpushows up under both Capacity and Allocatable. If it’s missing, the plugin isn’t running or hasn’t registered yet. - Confirm from inside the node. Shell into the node (or a debug pod with host access) and run
nvidia-smidirectly to rule out a driver installation problem versus a Kubernetes scheduling problem. - Set labels, taints, and tolerations. Taint GPU node pools so only inference pods land there, and add matching tolerations to your Deployment spec. This keeps CPU-only workloads from accidentally occupying expensive GPU nodes.
- Size
/dev/shmfor your parallelism strategy. NCCL communication between GPUs on multi-GPU pods needs real shared memory headroom, not the Kubernetes default.
ROCm setups often need hostIPC: true and sometimes hostNetwork: true for multi-GPU communication, requirements NVIDIA setups rarely hit at the same intensity.
Pro Tip: When a pod crashes with a cryptic CUDA initialization error, check driver version mismatch first. It’s the single most common cause, and nvidia-smi run directly on the node will tell you in ten seconds whether the driver is even loaded correctly.
Autoscaling: KEDA for Replicas, Cluster Autoscaler for Nodes
Autoscaling an LLM service takes two separate layers working together, and conflating them is where most teams get stuck. KEDA scales your Deployment’s replica count based on vLLM’s own queue-depth metric, vllm:num_requests_waiting, rather than generic CPU usage, which tells you almost nothing about whether requests are actually backing up.
Cluster Autoscaler or Karpenter handles the layer underneath: when KEDA asks for more replicas than the cluster has GPU capacity for, those pods sit Pending until the autoscaler provisions a new GPU node. The two systems don’t talk to each other directly. KEDA just reacts to queue metrics, and the autoscaler just reacts to Pending pods, but together they form a working scaling loop.
- For latency-sensitive paths, keep a small warm pool of replicas to avoid scaling up from a cold GPU node mid-request.
- Tune target queue depth and cooldown periods separately for spiky traffic (short cooldowns) versus steady-state load (longer cooldowns to avoid thrashing).
- Keep a small warm pool of replicas for latency-critical traffic and route bulk or batch requests through smaller models or a hosted API fallback.
Monitoring and Testing Your LLM Service on Kubernetes
Before you trust any autoscaling config, verify the service actually works. Run kubectl port-forward svc/vllm-inference 8000:8000, then curl the OpenAI-compatible /v1/chat/completions endpoint with a sample prompt. If that returns a coherent response, check the dedicated health endpoint next, then move on to load testing.
- Watch queue depth (
vllm:num_requests_waiting) as your primary signal for both health and autoscaling decisions. - Track token throughput and request latency percentiles, not just averages. P99 latency on LLM inference behaves very differently from P50 under load.
- Wire GPU utilization through DCGM exporter into Prometheus so you can see memory pressure before it causes an OOM kill.
- Log sanitized prompt and response metadata alongside model version and token counts. That data is what lets you catch model drift and reconcile billing later.
Prometheus needs to actually expose these metrics before KEDA can trigger on them. A KEDA ScaledObject pointed at a Prometheus query that returns no data will silently never scale, which is a frustrating way to discover a wiring gap in production.
Troubleshooting Cold Starts, OOMs, and Pending Pods
Most Kubernetes LLM deployment incidents fall into one of four categories, and each has a fast, specific fix.
- Probe kills the container during model load. This is the most common failure by far. Measure actual cold-start time with probes disabled, then set
initialDelaySecondsandfailureThresholdwell above that measured time, not a guess. - Out-of-memory crashes. Lower
--gpu-memory-utilization, shrink the context window, switch to a quantized checkpoint, or shard the model across more GPUs with tensor parallelism. - Pods stuck Pending. Check
kubectl describe nodefor GPU capacity and confirm your Cluster Autoscaler or Karpenter node pool is actually tainted and labeled to match your pod’s tolerations. - Slow or failed image pulls and downloads. Long Hugging Face token or weight-download delays usually mean it’s time to move that download into an initContainer writing to a PVC, or pre-bake the model for services where cold-start latency is non-negotiable.
Cross-reference logs against timing. A pod that dies at exactly your initialDelaySeconds mark is a probe problem, not a model problem, and that distinction saves hours of debugging the wrong layer.
When Should You Self-Host vs. Use a Hosted LLM API?
Prototype on a hosted API first. Self-hosting on Kubernetes starts paying for itself once you have sustained token throughput, latency SLOs a shared hosted endpoint can’t guarantee, or data residency and contractual constraints that require the model to stay inside your own infrastructure.
- If your traffic is bursty and low-volume, a hosted API’s pay-per-token pricing usually beats the fixed cost of GPU nodes sitting idle between requests.
- If you’re running sustained production traffic, self-hosting checklists generally show the GPU and ops cost breaking even against API spend once volume is consistently high.
- If your ops team is small, a managed inference provider or colocated managed Kubernetes nodes can split the difference: you get infrastructure control without running the entire GPU fleet yourself.
Data Privacy and Compliance Considerations for LLM Deployments
Self-hosting on Kubernetes is often the compliance-driven choice in the first place. If your prompts contain protected health information, financial records, or any data covered by a data residency requirement, keeping inference inside your own cluster removes an entire category of third-party data-handling risk that comes with a hosted API call.
That said, self-hosting doesn’t automatically make you compliant. It just moves the responsibility onto your own infrastructure. You still need to answer where prompt and response logs live, how long they’re retained, and who inside your organization can access them. A gateway sitting in front of vLLM to handle logging and data-loss-prevention checks is worth building for exactly this reason: centralizing that layer means you have one place to enforce retention policy instead of scattering it across every service that calls the model.
Pay particular attention to what gets logged for observability. Recording sanitized prompt and response metadata for drift detection and billing is standard practice, but “sanitized” is doing real work in that sentence. Strip or hash personally identifiable information before it ever reaches your logging pipeline, not after. Retrofitting redaction into logs that already contain raw customer data defeats the purpose.
If your organization operates under specific frameworks like HIPAA or SOC 2, treat your GPU node pool, PVC-backed model cache, and any logging sidecar as in-scope infrastructure requiring the same access controls, encryption at rest, and audit trails as any other regulated system. A local, self-hosted model isn’t a compliance shortcut. It’s a different set of controls to implement correctly.
Model Update and Rollback Strategies for LLMs on Kubernetes
Rolling out a new model version needs a different mental model than rolling out a new application build, mostly because the “artifact” is a multi-gigabyte checkpoint instead of a container layer diff.
The cleanest pattern separates the model weights from the application image entirely. Store each model version in its own PVC or object storage path, and reference the active version through an environment variable or config map rather than baking a version number into the image tag. That lets you roll back by changing one value and restarting pods, rather than rebuilding and repushing an image.
For the rollout itself, standard Kubernetes rolling updates work, but tune maxSurge and maxUnavailable carefully given how expensive and slow GPU pods are to start. A default rolling update strategy that tries to bring up several new GPU pods simultaneously can starve your node pool and leave you with fewer ready replicas than before the update started, not more.
Canary rollouts matter more for LLMs than for typical services, because model quality regressions don’t always show up as errors. A new checkpoint can serve perfectly formed responses that are subtly worse, more prone to hallucination, or slower under load. Route a small percentage of traffic to the new version behind your gateway, compare latency and token throughput against the previous version, and only shift full traffic once you’ve validated both performance and output quality on real requests. Keep the previous version’s PVC and Deployment definition around, untouched, until you’re confident. That’s your rollback path, and it should take one command to execute, not an emergency rebuild.

CI/CD Pipelines for LLM Kubernetes Deployment
A CI/CD pipeline for LLM deployment needs to handle two artifacts that update on very different schedules: the application image and the model weights. Treating them as one pipeline stage is where most teams overcomplicate things.
Your application image pipeline looks like any other containerized service. Build on every merge to your main branch, run automated tests against a mock or smaller stand-in model to keep CI fast, scan the image for vulnerabilities, push to your registry with a semantic version tag, and never overwrite an existing tag. Automated tests here should include a smoke test that actually starts the container and hits the health endpoint, not just unit tests against application logic.
Model weight updates belong in a separate pipeline entirely, usually triggered manually or on a schedule rather than on every commit. That pipeline downloads or converts the new checkpoint, runs it through your quality evaluation suite, and if it passes, uploads it to the storage location your initContainer or download job references, tagged with its own version identifier separate from your application version.
Deployment itself should go through Helm or a GitOps tool like Argo CD or Flux, applying the same values file changes across environments so your staging and production deployments never drift. Gate production promotion behind the canary validation described above rather than a fixed test suite, since model quality regressions are exactly the kind of thing unit tests won’t catch. A Continuous Integration Assessment can catch pipeline gaps like these before they cause an incident instead of after.
Performance Optimization for LLM Inference on Kubernetes
The biggest performance lever most teams leave unpulled is --gpu-memory-utilization tuning. Setting it too conservatively wastes VRAM that could hold a larger KV cache, which directly limits how many concurrent requests a single replica can serve before queuing starts.
Quantization is the next lever, and it’s often underused because teams assume it costs too much accuracy. Running a model at 8-bit or 4-bit precision instead of full precision can dramatically cut memory footprint, letting you fit a larger model per GPU or run more replicas on the same hardware. Test output quality against your specific use case before committing, since quantization’s accuracy cost varies by task.

Batching behavior matters more for throughput than almost anything else. vLLM’s continuous batching already handles most of this automatically, but request patterns still matter: a service fielding many short prompts benefits from different tuning than one handling long-context requests, and mixing both workload types on the same replica pool often hurts both.
Context window sizing directly trades against concurrent request capacity. A model configured for a 32k context window reserves KV cache space per request that a 4k context window wouldn’t need, meaning the same GPU serves fewer simultaneous users at the larger window. Size your context window to what your actual use case needs, not the model’s maximum supported length.
Finally, don’t ignore network overhead between your gateway and inference pods. For latency-sensitive applications, colocating the gateway and inference pods in the same availability zone, or even the same node pool, removes cross-zone latency that adds up when you’re already fighting for every millisecond against model inference time itself.
Multi-Tenancy and Tenant Isolation for LLM Services
Running one shared model across multiple tenants is efficient right up until one tenant’s traffic spike degrades latency for everyone else. Solving this on Kubernetes comes down to choosing where isolation happens: at the namespace level, the node pool level, or inside the request routing layer.
Namespace-level isolation is the lightest touch. Each tenant gets a ResourceQuota and LimitRange inside their own namespace, which caps how many GPU resources their workloads can request, but this only works cleanly if each tenant runs their own model replicas rather than sharing a pool.
For a shared inference pool serving many tenants against the same model, isolation has to happen at the request level instead. A gateway in front of vLLM should tag every request with a tenant identifier, enforce per-tenant rate limits, and route large or noisy-neighbor tenants to a dedicated node pool while smaller tenants share a common pool. This is also where token accounting and billing naturally live, since you already need per-tenant tracking for isolation.
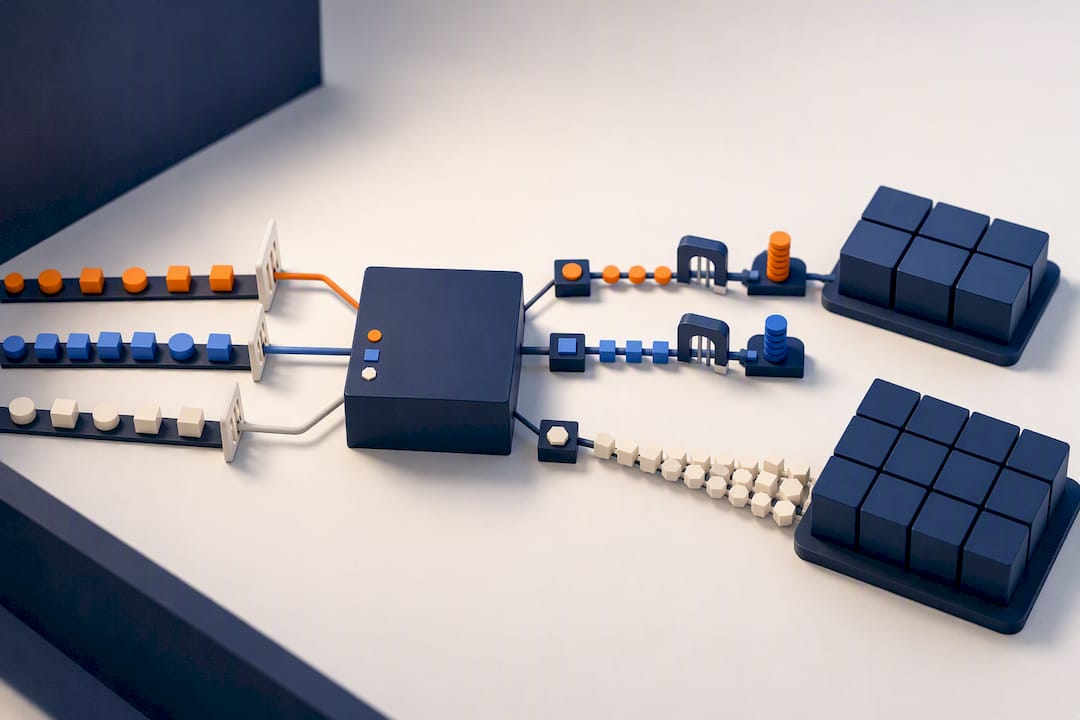
For tenants with strict data or performance guarantees, dedicated node pools with taints and tolerations give you hard isolation: no other tenant’s pods can schedule there, and a noisy tenant can’t starve another’s GPU capacity. This costs more in idle capacity but removes any ambiguity about blast radius when something goes wrong.
Network policies matter here too. A NetworkPolicy restricting which namespaces can reach the inference Service prevents a compromised or misconfigured tenant workload from directly hitting another tenant’s model endpoint, forcing all cross-tenant traffic through the gateway where it can actually be audited.
Security Best Practices for LLM Deployments on Kubernetes
Exposing vLLM’s endpoint directly to any pod that can resolve a Service DNS name is the most common security gap in Kubernetes LLM setups. Fix it with a default-deny NetworkPolicy on the namespace, then explicitly allow traffic only from your gateway or API layer to the inference pods. Nothing else should be able to reach port 8000 directly.
Role-based access control needs the same scrutiny. The Secret holding your Hugging Face token or S3 credentials should be readable only by the service account your Deployment and initContainer actually use, not by every service account in the namespace. Audit this with kubectl auth can-i checks periodically, since permissions tend to drift wider than intended as teams add new services.
Run containers as non-root with a read-only root filesystem where possible, and drop unnecessary Linux capabilities. GPU workloads sometimes need elevated privileges for driver access, so scope those specifically rather than granting broad privileged access to the entire pod.
Beyond the cluster itself, put real access controls on who can call the model at all. API key or OAuth-based authentication at your gateway layer, combined with per-key rate limiting, prevents both abuse and runaway cost from a single misbehaving client. Log every request’s authentication context alongside the sanitized prompt metadata described earlier, so a security incident has an actual audit trail to investigate rather than a black box.
Why Bowtie Thinks Most Teams Underestimate the Operations Side
Everyone focuses on the vLLM flags and the Helm values. The part that actually breaks in production is almost always operational: probe thresholds set from a guess instead of a measurement, a rollback plan that only exists as an idea, or a security review that happens after launch instead of before. Bowtie’s Dockerizing Your Application and Infrastructure Assessment work exists because the gap between “it runs on my test cluster” and “it survives production traffic” is where most self-hosted LLM projects actually fail.
— Chad
Get Help Shipping Your LLM Deployment to Production
Reading this playbook and actually running it under real traffic are two different problems, and the second one is where most teams lose weeks they didn’t budget for. If you’re staring at a half-working Deployment, a probe that keeps crash-looping, or a cluster that scaled but somehow made latency worse, Bowtie’s engineers do this work directly rather than handing you another guide.
Bowtie’s Infrastructure Assessment service reviews your existing cluster configuration, GPU node setup, and autoscaling logic to find exactly where the gaps are, priced at $2,750 one-off. If your model server still needs containerizing correctly, Dockerizing Your Application covers that build from scratch for $3,800 one-off. And if you’re not sure your CI/CD pipeline is even ready for a model-weight rollout, a Continuous Integration (CI) Assessment at $4,500 one-off will tell you before your next deploy does it for you. Check current pricing and service details and request a deployment review to get your production rollout plan started.
Primary Docs and Tutorials Worth Bookmarking
Keep these open in a tab while you build. Each one covers a specific piece of the stack in more depth than any single article can.
- The vLLM Kubernetes deployment docs for manifest examples and probe configuration.
- The LeaderWorkerSet vLLM example for multi-node tensor-parallel setups.
- The GKE tutorial for serving Llama models with vLLM for real cloud sizing examples.
- The vLLM Helm chart docs for parameterized, repeatable deployments.
Sources
FAQ
Why Is Kubernetes So Hard for LLM Workloads?
Kubernetes itself isn’t harder for LLMs than for any other workload, but LLM-specific constraints expose gaps that most Kubernetes setups never had to handle: multi-minute cold starts that trip default probe settings, GPU resources that can’t be overcommitted like CPU, and shared memory requirements that crash pods configured with default /dev/shm limits. Most of the difficulty comes from those specific gotchas, not Kubernetes’ general complexity.
Is Netflix Using Kubernetes?
Netflix has historically relied heavily on its own container orchestration tooling and AWS-native infrastructure rather than running everything on Kubernetes, though large streaming and tech companies broadly use Kubernetes container orchestration for many workloads. Specific internal infrastructure choices at any single company change over time and aren’t something to build your own deployment decisions around.
How Do You Deploy an LLM on Kubernetes?
Containerize the model server, typically vLLM, apply a Deployment with GPU resource requests and a mounted PVC for weights, expose it through a ClusterIP Service, and set generous readiness probe thresholds since model loading can take several minutes on large checkpoints. Add KEDA and a cluster autoscaler once you need automatic scaling based on real traffic.
Can I Learn Kubernetes in Two Days?
You can learn enough Kubernetes basics in two days to understand Pods, Deployments, and Services, but production-grade Kubernetes LLM deployment, including GPU scheduling, probe tuning, and autoscaling, takes considerably longer to get comfortable with through hands-on practice. Treat two days as a starting point for vocabulary and concepts, not a finish line for running GPU workloads safely in production.
Should I Build My Own Kubernetes Setup or Get Help?
Teams with existing platform engineering experience can absolutely build this themselves using the patterns in this guide. Teams without that bandwidth often save more time getting an Infrastructure Assessment to catch configuration gaps before they become production incidents, priced at $2,750 one-off.